

Short answer
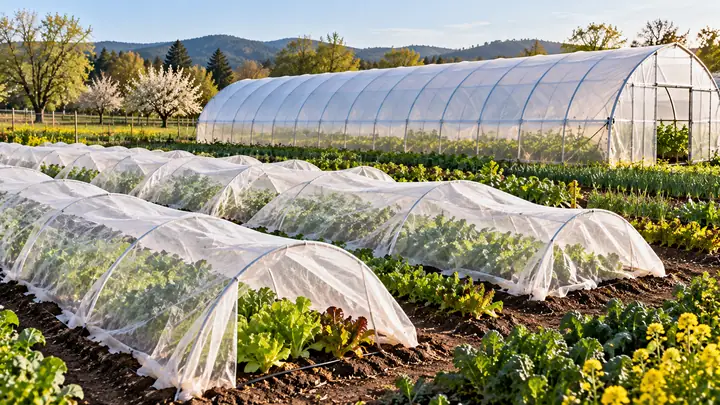
A poly tunnel is a hoop-framed structure covered with polyethylene film or fabric that extends the growing season. Low tunnels are 0.45–0.9 m (18–36 in) tall over one or two beds; caterpillar tunnels are walk-in, about 3–6 m (10–20 ft) wide, with film held by ropes; high tunnels are permanent, about 3–4.5 m tall, with end walls and roll-up sides.
What is a poly tunnel?
A poly tunnel is a hoop-framed growing structure covered with polyethylene film or fabric that warms crops, shelters them from wind and rain, and extends the season by weeks or months. Poly tunnels range from knee-high low tunnels over a single bed, through walk-in caterpillar tunnels held down by ropes, to permanent high tunnels with end walls and roll-up sides.
This guide compares the three main types of plastic tunnel used by market gardeners and farms, with sizes, materials, costs and the crops each suits. It focuses on low and caterpillar tunnels; permanent structures are compared in our hoop house vs. high tunnel vs. polytunnel guide.
Low tunnel vs caterpillar tunnel vs high tunnel: how do they compare?
The three tunnel types differ mainly in height, permanence and how you work inside them. The table summarizes typical specifications; dimensions vary by design and supplier.
| Feature | Low tunnel | Caterpillar tunnel | High tunnel |
|---|---|---|---|
| Height | About 0.45–0.9 m (18–36 in) | About 2–2.7 m (7–9 ft) | About 3–4.5 m (10–15 ft) |
| Width | One or two beds, about 0.9–1.8 m (3–6 ft) | About 3–6 m (10–20 ft) | About 6–12 m (20–40 ft); 9 m (30 ft) is common |
| Hoops | Galvanized wire, EMT conduit or PVC, every 1.2–1.8 m (4–6 ft) | Steel or PVC bows on ground stakes, every 1.5–3 m (5–10 ft) | Galvanized steel bows with purlins, every 1.2–1.8 m |
| Cover | Row cover fabric, film or insect netting | 6 mil greenhouse film held by ropes | 6 mil film, often double inflated, locked in channel |
| Access | Lift or remove the cover | Walk in; ends tied off | Walk-in doors, tractor access |
| Ventilation | Open ends or lift edges | Push sides up between ropes | Roll-up sides, end-wall vents |
| Permanence | Seasonal, moved every crop | Seasonal, movable between fields | Permanent or semi-permanent |
| Snow | Light snow only | Not snow-rated; remove cover before snow | Can be rated for local snow loads |
| Relative cost | Lowest | Low; often a fraction of a high tunnel per area | Highest of the three |
What is a low tunnel?
A low tunnel is a short row of hoops over one or two beds, covered with fabric or plastic, used to protect crops from frost, wind and insects. Low tunnels are also called hoop beds or garden tunnels, and the heat they trap can add a few degrees of protection on cold nights.
Low tunnel hoops and covers
- Hoops: 9- or 10-gauge galvanized wire hoops are the cheapest; heavier hoops bent from 1/2 in EMT conduit or steel tube resist wind and snow better. Push hoops 20–30 cm (8–12 in) into the soil, spaced about 1.2–1.8 m (4–6 ft) apart.
- Row cover: spun-bonded polypropylene in light to heavy weights, commonly about 17–68 g/m² (0.5–2 oz/yd²). Light covers let more light through and are used for insect exclusion; heavier frost blankets give more cold protection but less light.
- Clear film: 1–6 mil polyethylene warms soil and air more than fabric, but it overheats quickly on sunny days, so it must be vented.
- Insect netting: fine mesh over brassicas and carrots keeps out flea beetles, cabbage moths and root flies.
Hoop covers are held down with sandbags, soil along the edges or clips. A low tunnel kit usually includes hoops, cover and clips sized for one bed, and is a simple way to start low tunnel gardening.
How to build a DIY low tunnel
- Prepare and plant the bed, and lay drip tape before covering.
- Bend wire or conduit tunnel hoops to span the bed with about 30–45 cm (12–18 in) of clearance over the crop.
- Push hoops in every 1.2–1.8 m, keeping them in a straight line.
- Add a ridge line of twine or a tube along the top for stiffness in wind.
- Drape the cover with about 60 cm (2 ft) extra each side and at the ends.
- Anchor edges with sandbags or soil, and gather and stake the ends.
- Check temperature on sunny days and vent film covers before they overheat.
Low tunnels suit early lettuce, spinach, carrots, strawberries, overwintered greens and transplant protection. A low tunnel hoop house can even be placed inside a high tunnel for a second layer on the coldest nights.
What is a caterpillar tunnel?
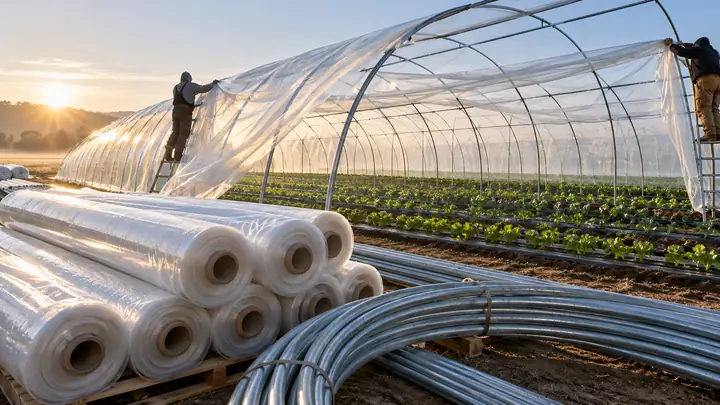
A caterpillar tunnel is a lightweight, walk-in poly tunnel with no baseboards or locking channel, in which the film is held over the hoops by ropes crossed between each pair of hoops. The ropes pull the plastic into ridges, giving the segmented "caterpillar" look. Caterpillar tunnels are popular with market gardeners because they are cheap, quick to put up and easy to move between fields.
- Typical size: about 3–6 m (10–20 ft) wide, 2–2.7 m (7–9 ft) high, and as long as the beds, sometimes 60–90 m (200–300 ft) or more.
- Frame: steel or PVC bows slipped over ground stakes, with heavy earth anchors at each end where the film is gathered and tied.
- Cover: 6 mil UV-stabilized greenhouse film; shade cloth or insect netting can replace it in summer.
- Ventilation: push the film up between ropes on warm days and drop it in the evening.
- Cost: materials typically cost a fraction of a high tunnel covering the same area, though prices change with steel and film costs.
The trade-off is weather resistance. A caterpillar tunnel greenhouse is not designed for snow loads, so the cover is usually removed before winter in snowy regions, and the ropes need regular tightening in windy sites.
What are caterpillar tunnels used for?
Caterpillar tunnels are used for early and late tomatoes, peppers, cucumbers and greens, as tomato tunnels that keep rain off foliage to reduce leaf diseases, and for cut flowers. Tunnel flowers such as lisianthus, snapdragons and ranunculus benefit from protection against wind and rain, which improves stem length and quality. Low caterpillar tunnels, a shorter version about 1–1.5 m tall, bridge the gap between low tunnels and walk-in tunnels for one or two beds.
When should you move up to high tunnel farming?
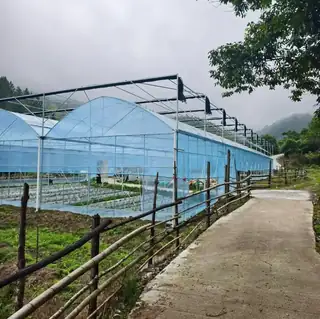
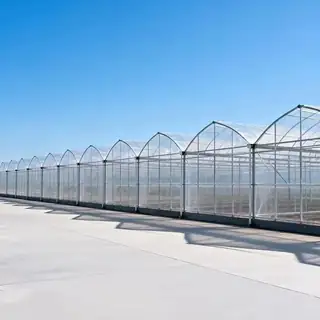
High tunnel farming makes sense when you want a permanent structure that withstands local wind and snow, gives tractor access and supports long-season crops such as trellised tomatoes. High tunnels have baseboards, end walls with doors, film locked in channels, roll-up sides and, often, a double inflated roof. They cost more per square meter than caterpillar tunnels but last much longer.
In the US, high tunnels that meet USDA NRCS Conservation Practice Standard 325 may qualify for partial payment through the EQIP program; low tunnels are excluded from that practice. See our high tunnel grant guide for how it works and our greenhouse cost guide for typical prices. For a DIY high tunnel greenhouse, choose galvanized steel hoops and a design rated for your local loads rather than scaling up a PVC frame.
How do you choose the right poly tunnel?
Choose a poly tunnel by your crops, climate, budget and how often you rotate fields. A quick decision guide:
- Low tunnel if you need cheap frost and insect protection on low crops for a few weeks at each end of the season.
- Caterpillar tunnel if you want walk-in space for tall crops, plan to move the tunnel every year or two, and can take the cover off before snow.
- High tunnel if you need year-round use, snow and wind ratings, tractor access or long-term trellised crops.
Whatever the type, plan irrigation before covering, because rain no longer reaches the beds. Drip tape under the cover is the usual choice; see drip irrigation for vegetables and small farms. For covering choices, read our greenhouse plastic film guide, and for summer heat, the guide to shade cloth and cooling.
What should you check when buying a tunnel kit?
When comparing tunnel kits, look past the headline price and check the specification:
- Hoop material and wall thickness: galvanized steel tube outlasts PVC; ask for the tube diameter and gauge.
- Hoop spacing recommended for your wind exposure.
- Anchors: ground stakes and end anchors suited to your soil.
- Cover: UV-stabilized greenhouse film with a stated rated life, not generic polythene tunnel sheeting.
- Ventilation and access: how the sides lift and how the ends open.
- Expandability: whether extra hoops can be added to lengthen the tunnel later.
A light garden tunnel kit will differ a lot from a farm-grade structure, so match the kit to how long you expect it to last.
What are common poly tunnel mistakes?
Most poly tunnel failures come from wind, heat or poor anchoring rather than the materials. Avoid these common mistakes:
- Weak anchoring: use auger anchors at caterpillar ends and bury or weigh low tunnel edges well.
- Forgetting to vent: closed film tunnels can exceed 40 °C (104 °F) on a sunny day.
- Using non-UV plastic: it turns brittle within one season.
- Leaving covers on in heavy snow on structures that are not snow-rated.
- Orienting tunnels across prevailing wind where it can be avoided.
Next steps
A poly tunnel, whether a low tunnel, a caterpillar or a full high tunnel, is one of the most cost-effective ways to extend the season. When you are ready for a permanent, load-rated structure, Mars Vertical Farm manufactures galvanized steel tunnel and multi-span greenhouses, such as the customized multi-span steel frame film greenhouse, supplied factory-direct with film, channels and fittings. Browse our greenhouses or send us your field size and climate for a custom-sized quote.